OK, so you’ve just gotten a shiny new GoPro camera for Christmas and you’re wondering how you can start creating some ‘radical’ looking videos to post on YouTube.
One of the better features of the Hero3 and later versions of these cameras is the ability to do time-lapse photography. The Hero3 makes it easy to navigate to a setup screen for time lapse, where you can choose the amount of time between successive photographs. Choosing a longer time interval between photos results in a more ‘time-compressed’ series of pictures.
The video below shows a good example of time compression via time lapse photography. These images were taken over a period of ~5 hours with an interval of 30 seconds between each frame. This produced a series of over 600 still frames that were combined into a video sequence at 30 frames/second using Sony Vegas video editing software.
https://youtu.be/IHO7r3M0Lvc
While a static time lapse can be interesting, the ability to slowly pan the camera during the capture sequence can make it more dramatic, especially for outdoor scenes. The combination of a time lapse with panning is used to create the mesmerizing opening shots for the NetFlix series, “House of Cards“.
You might think that the equipment needed for this technique is complicated and expensive. If you are planning to shoot a high budget movie or TV show, then maybe it is. But if you’d like to experiment with this on your own, with a little ingenuity you can produce panning time lapse sequences with equipment that’s readily available at a local hardware store. In what follows, I’ll show you how to do this:
1.) Required items:
– GoPro camera or equivalent camera that is capable of taking time lapse images
– 24 hour timer – the kind you get for Christmas lights – with a mechanically rotating dial.
– Mounting post for the camera and timer
– For long time lapse sequences, a hefty battery or ability to plug into an AC wall socket.
2.) Here’s how to turn the 24 hour timer into a panning camera stage:
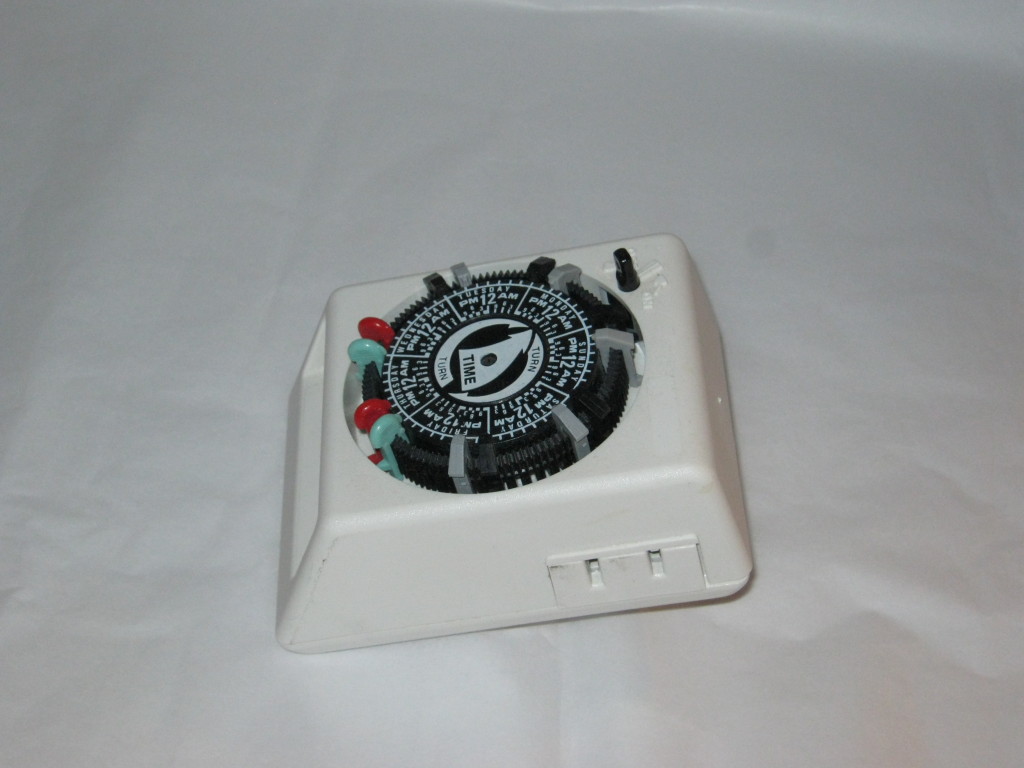
– A 24-hour light timer looks like this:
The guts of this handy little device consist of a synchronous AC motor that is geared to produce one complete revolution of the dial face in 24 hours.
To turn this into a camera panning stage, we’ll have to make some modifications:
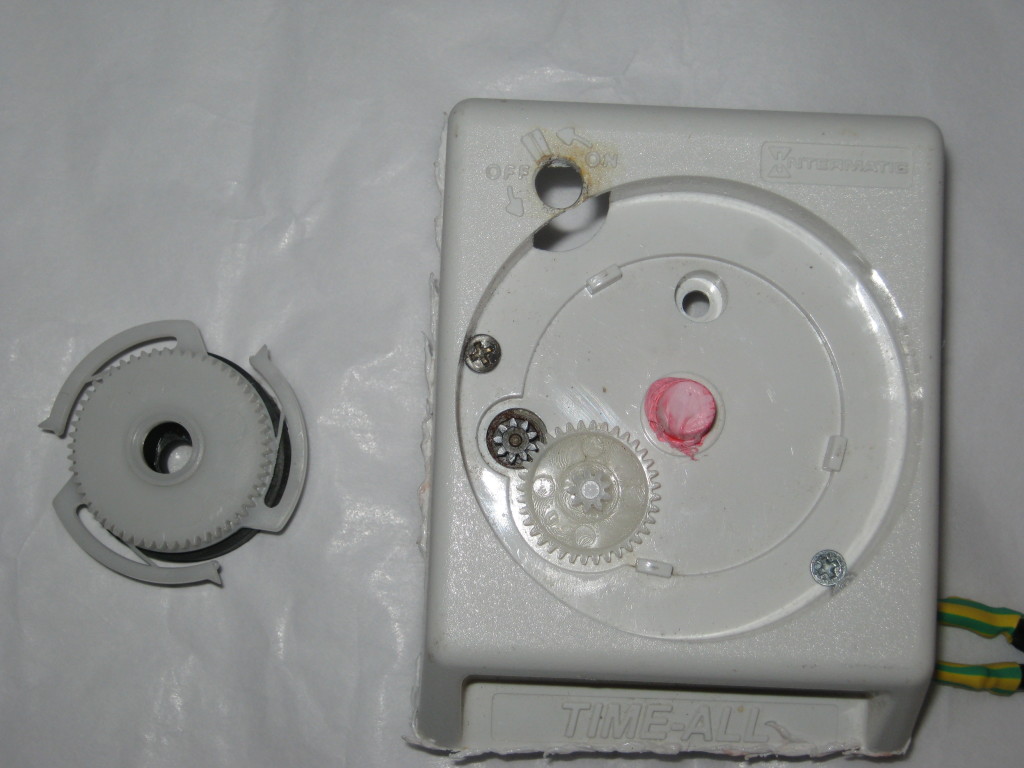
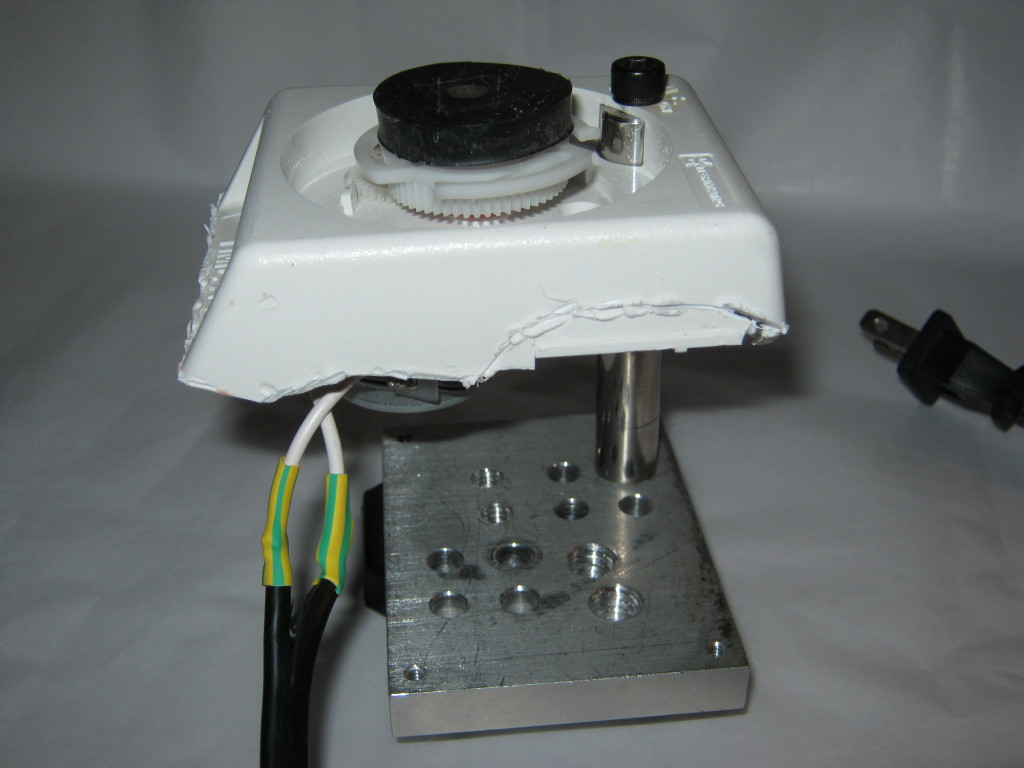
First, strip off the face plate and lift off the plastic gear that the dial face is attached to. When you remove the face plate gear, you will see a small metal gear (~9 0’clock position in the picture.) This is the driving gear from the synchronous motor. Save the face plate gear – we will use that to attach the camera to since that’s what rotates once every 24 hours.
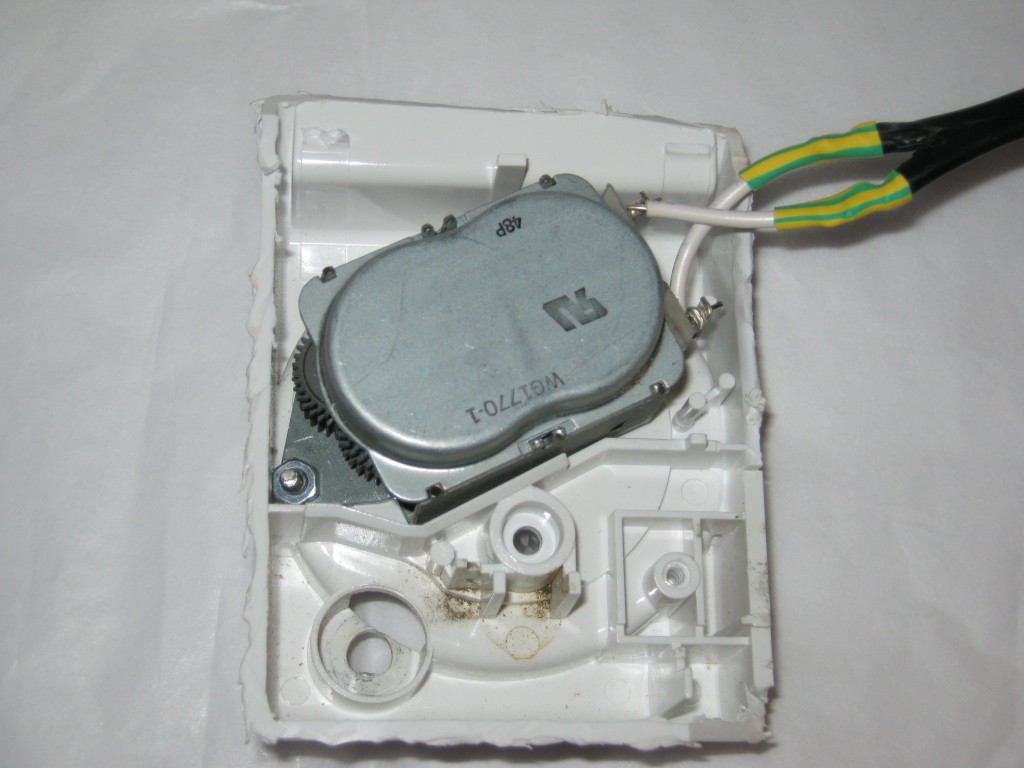
Next, cut away the bottom plastic from the timer to reveal the synchronous motor. You will need to attach an AC lamp cord to the 2 terminals on the motor as shown in the photo. Also, make sure that the motor is securely attached to the timer housing.
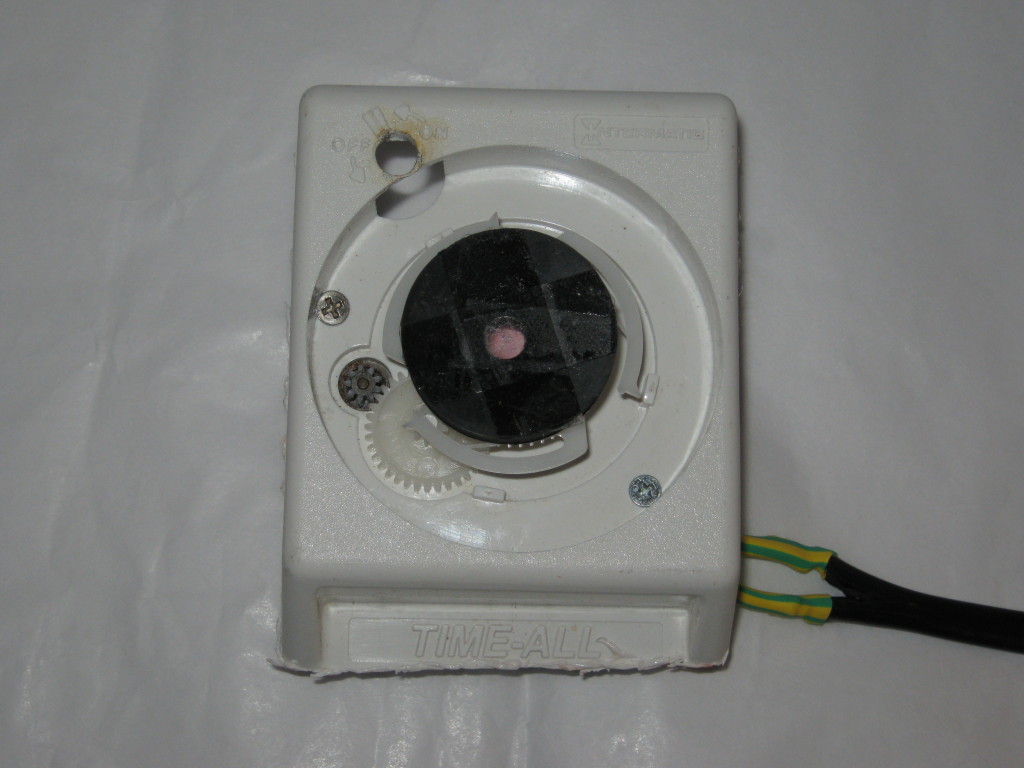
With the motor wired to a lamp cord and secured to the timer housing, attach a thick washer (or any other kind of top plate) to the top of the face plate gear. This is the piece that you attach the camera to so make sure it is relatively sturdy. Re-attach the face plate gear to the gear in the timer housing.
Now mount the modified timer assembly onto a post or some other stable support . In my case, I had an optical post with 1/4-20 screw threads that did the job nicely. You can see that the black washer on top is thick and solid enough to support a camera body.
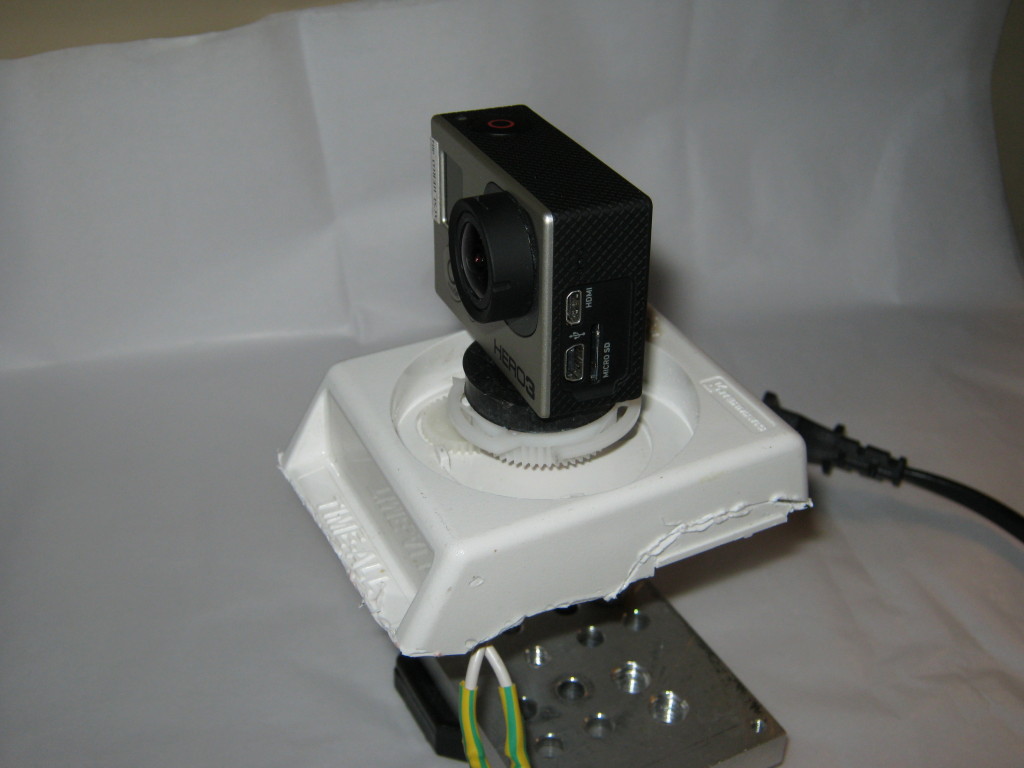
Here’s what the assembled panning stage looks like with a GoPro Hero3 attached. When you plug the stage into an AC outlet, the motor starts running and your panning stage is ready to go!
Check out the video below to see the results of a panning time lapse using this rig.
https://youtu.be/do4JRcwxyZk
